Michelle LaBrosse, PMP
Initiation

For a little bit of summer in January
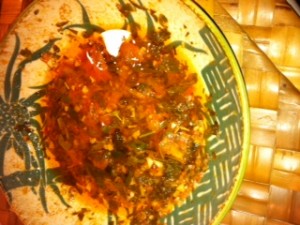
Yes it is January 16th and I am posting a recipe called The “Summer” Sauce. I am here at a tropical location as part of the support crew for an interesting extension to our business. For the past twelve years we have used an 8 minute series of yoga stretching and breathing techniques to help people maintain their minds in peak performing condition while they are doing the Cheetah Learning courses. We are extending the program to create a whole series of 8 minute yoga videos for people to do throughout the day. And I am thanking my lucky stars we have certified and professional yogini’s – Anne Lindsley and Pamela Sery – making these 8 minute yoga videos. I’m more than happy to be on the support team and not the one in front of the camera for a change. Part of my support role is resident chef. Tonight’s dinner was homemade pasta accompanied by The “Summer” sauce. This recipe makes enough pasta and sauce for 8 hungry people.
Planning
Yes this meal did take some planning. My sous chef (AKA assistant kitchen wench, AKA intern Brook) milled about ten cups of an organic Kamut flour at our Portland office before heading over here. She also packed the pasta maker.
The rest we picked up over here:
1 tbs Chia Seeds
6 Eggs
2 Lemons
2 tbs Olive Oil
1 head of garlic (10 – 15 cloves)
5 – 8 Large Fresh Tomatoes
1 bunch Fresh Parsley
1/4 cup fresh Oregano leaves
1 cup fresh basil leaves
Pepper
Salt
Execution
Pasta
Step 1 – Make the Pasta Dough – Mix 3 cups of the Kamut flour, 1 tsp salt, 1/8th tsp pepper, 1 tbs chia seeds, and grated rind of one lemon. Stir all together. Make a well in the center. Put six eggs into the middle and mix until all the flour is wetted with the eggs. Make it into a ball and wrap in saran wrap. Let sit for 2 – 3 hours so the flour can continue absorbing moisture of the eggs.
Step 2 – Make the Pasta –
1. cut off about a half a fist size of the pasta dough.
2, Roll it in some Kamut flour to prevent it from being sticky.
3. Flatten it out with your hand.
4. With a standard hand crank pasta maker – put it through the widest setting.
5. Put more flour on the now flattened dough to keep it from sticking to the rollers.
6. Double it over and roll through the widest setting two more times.
7, Continue flouring the flattened dough as needed to keep it from sticking.
8. Roll it through increasing narrower openings of the pasta maker – go to the 5th or 6th level until the dough starts getting too thin.
9. Cut the wide sheets to the length you want for the noodles – we usually limit it to about 9 – 12 inches.
10. Stack the sheets on top of each other with flour between each sheet until you are finished with all the wide sheets.
Repeat “Make the Pasta” steps 1 – 10 until you have used all the dough.
Once you’ve used all the dough to make the wide sheets, then you can attach the noodle attachment to make the linguine noodles. As you make the noodles, drape them over the side of the pasta cooking pan and let air dry for about 1/2 hour to an hour
Once the sauce is all assembled, boil water in a deep stock pot (put 1 tsp salt and 1 tsp olive oil in the water). We use a pasta pot with the straining pot that holds the pasta that fits right into the stock pot. Once the water is boiling, put in the pasta. Cook about five minutes or until the pasta feels soft and not chewy. Remove from the stove immediately and drain the water. Put the Pasta in a serving bowl.
Step 3 – Make the Sauce
Peel all the cloves of garlic and dice up fine.
Place the diced garlic in a large fry pan with the olive oil. Put it on a low setting – you want to “sweat” the garlic – this means cooking it on a very low heat so as not to brown it. It may be sweating up to a half hour depending on how long it takes you to roast the tomatoes. Keep the temperature very low.
Put the whole tomatoes on a grill or under the broiler. You want to blister the skins of the tomatoes – this caramelizes the tomatoes and brings out the sugar flavors in them. It’s not necessary to brown the skins of the tomato’s (but it is not a big deal if you do either) – mostly you want the skin to blister so it’s easy to pull off and the tomatoes to soften a little under the intense heat. Pull them out of the oven or off the grill and allow them to cool so you can pull the skins off without burning your fingers.
While you are waiting for the tomatoes to cool, grate the lemon rind from the other lemon you haven’t grated yet. Put the lemon rind into the garlic. Then juice both lemons (you will have the lemon left over that you grated the rind for the pasta). Remove any seeds and put the juice from these two lemons into the sweating garlic.
Once the tomatoes are not so hot you will burn your fingers, remove the blistered skin. Remove the hard core of the top part of the tomato and dice into 1/2 inches pieces. Put the diced tomatoes and all their juice into the pan with the garlic and the lemons.
Reduce the liquid in the sauce over about a 1/2 hour. While the sauce is reducing, put in about 1/2 tsp of salt.
Finely chop the bunch of parsley, basil leaves and oregano. Once the sauce is reduced and just a little thick, add the herbs and mix thoroughly. Continue to simmer for 5 – 15 minutes – while the pasta water is boiling then cooking.
Put the pasta sauce in a serving bowl.
Step 4 – Enjoy – the sauce is meant to be an accent for the pasta. You can also put grated cheese over the pasta before you put the sauce on it.
Monitor and Control
Make sure people know the sauce is meant to be an accent to the pasta so the early folks don’t take it all for their own.
Lessons Learned
Often times we are sharing our table with vegetarians. Many times I will make a special entree specifically for the vegetarian diners. In one instance the visiting vegetarian thought the sauce was all for him. I make sure now I tell the vegetarian diners the sauce is for all to share and is just meant as an accent to the pasta.
Also, it’s better to have the pasta dough be a little bit moist when you first make it. You can absorb the moisture for the small amounts as you are putting it through the pasta maker with extra flour so make sure you have extra flour on hand for this important task.


