Archive for the ‘Project Menu’ Category

The “Summer” Sauce

Thursday, January 17th, 2013

Michelle LaBrosse, PMP

Initiation

For a little bit of summer in January - The "Summer" Sauce

For a little bit of summer in January

Yes it is January 16th and I am posting a recipe called The “Summer” Sauce.  I am here at a tropical location as part of the support crew for an interesting extension to our business.   For the past twelve years we have used an 8 minute series of yoga stretching and breathing techniques to help people maintain their minds in peak performing condition while they are doing the Cheetah Learning courses.   We are extending the program to create a whole series of 8 minute yoga videos for people to do throughout the day.  And I am thanking my lucky stars we have certified and professional yogini’s – Anne Lindsley and Pamela Sery – making these 8 minute yoga videos.   I’m more than happy to be on the support team and not the one in front of the camera for a change.  Part of my support role is resident chef. Tonight’s dinner was homemade pasta accompanied by The “Summer” sauce.   This recipe makes enough pasta and sauce for 8 hungry people.

Planning

Yes this meal did take some planning.   My sous chef (AKA assistant kitchen wench, AKA intern Brook) milled about ten cups of an organic Kamut flour at our Portland office before heading over here.   She also packed the pasta maker.

The rest we picked up over here:

1 tbs Chia Seeds

6 Eggs

2 Lemons

2 tbs Olive Oil

1 head of garlic (10 – 15 cloves)

5 – 8 Large Fresh Tomatoes

1 bunch Fresh Parsley

1/4 cup fresh Oregano leaves

1 cup fresh basil leaves

Pepper

Salt

Execution

Pasta

Step 1 – Make the Pasta Dough – Mix 3 cups of the Kamut flour, 1 tsp salt, 1/8th tsp pepper, 1 tbs chia seeds, and grated rind of one lemon.  Stir all together.   Make a well in the center.   Put six eggs into the middle and mix until all the flour is wetted with the eggs.   Make it into a ball and wrap in saran wrap.   Let sit for 2 – 3 hours so the flour can continue absorbing moisture of the eggs.

Step 2 – Make the Pasta –

1. cut off about a half a fist size of the pasta dough.

2, Roll it in some Kamut flour to prevent it from being sticky.

3. Flatten it out with your hand.

4. With a standard hand crank pasta maker – put it through the widest setting.

5. Put more flour on the now flattened dough to keep it from sticking to the rollers.

6. Double it over and roll through the widest setting two more times.

7, Continue flouring the flattened dough as needed to keep it from sticking.

8. Roll it through increasing narrower openings of the pasta maker – go to the 5th or 6th level until the dough starts getting too thin.

9. Cut the wide sheets to the length you want for the noodles – we usually limit it to about 9 – 12 inches.

10. Stack the sheets on top of each other with flour between each sheet until you are finished with all the wide sheets.

Repeat “Make the Pasta” steps 1 – 10 until you have used all the dough.

Once you’ve used all the dough to make the wide sheets, then you can attach the noodle attachment to make the linguine noodles.   As you make the noodles, drape them over the side of the pasta cooking pan and let air dry for about 1/2 hour to an hour

Once the sauce is all assembled, boil water in a deep stock pot (put 1 tsp salt and 1 tsp olive oil in the water).   We use a pasta pot with the straining pot that holds the pasta that fits right into the stock pot.   Once the water is boiling, put in the pasta.   Cook about five minutes or until the pasta feels soft and not chewy.   Remove from the stove immediately and drain the water.   Put the Pasta in a serving bowl.

Step 3 – Make the Sauce

Peel all the cloves of garlic and dice up fine.

Place the diced garlic in a large fry pan with the olive oil.   Put it on a low setting – you want to “sweat” the garlic – this means cooking it on a very low heat so as not to brown it.   It may be sweating up to a half hour depending on how long it takes you to roast the tomatoes.   Keep the temperature very low.

Put the whole tomatoes on a grill or under the broiler.   You want to blister the skins of the tomatoes – this caramelizes the tomatoes and brings out the sugar flavors in them.   It’s not necessary to brown the skins of the tomato’s (but it is not a big deal if you do either) – mostly you want the skin to blister so it’s easy to pull off and the tomatoes to soften a little under the intense heat.  Pull them out of the oven or off the grill and allow them to cool so you can pull the skins off without burning your fingers.

While you are waiting for the tomatoes to cool, grate the lemon rind from the other lemon you haven’t grated yet.   Put the lemon rind into the garlic.  Then juice both lemons (you will have the lemon left over that you grated the rind for the pasta).   Remove any seeds and put the juice from these two lemons into the sweating garlic.

Once the tomatoes are not so hot you will burn your fingers, remove the blistered skin.   Remove the hard core of the top part of the tomato and dice into 1/2 inches pieces.   Put the diced tomatoes and all their juice into the pan with the garlic and the lemons.

Reduce the liquid in the sauce over about a 1/2 hour.   While the sauce is reducing, put in about 1/2 tsp of salt.

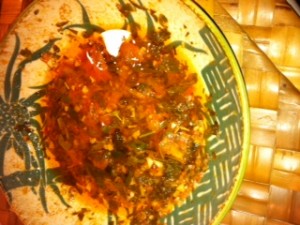
Finely chop the bunch of parsley, basil leaves and oregano.   Once the sauce is reduced and just a little thick, add the herbs and mix thoroughly.  Continue to simmer for 5 – 15 minutes – while the pasta water is boiling then cooking.

Put the pasta sauce in a serving bowl.

Step 4 – Enjoy  – the sauce is meant to be an accent for the pasta.   You can also put grated cheese over the pasta before you put the sauce on it.

Monitor and Control

Make sure people know the sauce is meant to be an accent to the pasta so the early folks don’t take it all for their own.

Lessons Learned

Often times we are sharing our table with vegetarians.   Many times I will make a special entree specifically for the vegetarian diners.   In one instance the visiting vegetarian thought the sauce was all for him.   I make sure now I tell the vegetarian diners the sauce is for all to share and is just meant as an accent to the pasta.

Also, it’s better to have the pasta dough be a little bit moist when you first make it.  You can absorb the moisture for the small amounts as you are putting it through the pasta maker with extra flour so make sure you have extra flour on hand for this important task.
Almond Milk – DIY

Friday, December 9th, 2011

Michelle LaBrosse, PMP

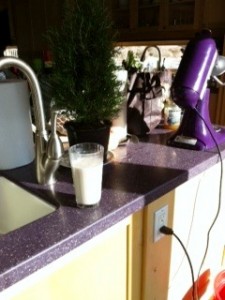
Initiation – I started making my own almond milk over the summer when I was working with my Mom to help her cure brain cancer.  Not that almond milk in and of itself is a cure for brain cancer, it’s just part of an overall healthier diet.  My Mom is lactose intolerant and she liked the care and attention that I was putting into her diet to help her as well.   It was easy enough to do so I’ve continued making it for friends and family.

Planning:

Ingredients

2 cups raw organic almonds
Filtered water

Tools

Blender
Clean dish cloth

Execution

1. Soak the almonds overnight in the filtered water.
2. Drain the water and rinse the almonds.
3. Put the almonds in the blender and cover with more filtered water.
4. Pulverize.
5. Strain the mash through a clean dish towel into a bowl.  Squeeze out all the liquid.
6. Put the mash back into the blender.   Repeat steps 3 – 5.
7. Refrigerate

Monitor and Control

The almond milk lasts for about a week in the fridge.   When it’s cold, it tastes pretty darn close to actual milk, and has a lot fewer calories.  It is lower in protein than regular milk (8g regular milk to 1g for the almond milk).   It tends to separate in the fridge but a quick shake brings it back.

Lessons Learned

For a treat, I heat up the almond milk with cardamon, cinnamon and nutmeg.

Curcumin Root – the miracle cure for brain cancer

Friday, October 28th, 2011

A while back I mentioned my Mom has brain cancer.  It’s been a very tough journey for our family.   Her doctor in Connecticut put her on hospice in September and told one of my brothers she might only have a few more weeks to live.   It’s now almost November and Mom is alive and actually recovering with us in Florida.   Why?   I was able to find curcumin root at the Whole Foods in Sarasota.   Back in June I had found curcumin root at the Whole Foods in Glastonbury, Connecticut.   I had her drinking a tea from the root a couple times a day.   Over a three week period back in June she regained some of the capabilities she had lost then and appeared to be on her way to recovery.   But then I did not know how important this root was for her recovery.  We had to switch to a pill form of turmeric because Whole Foods and other local health food grocers could no longer get the roots.   She suffered a dramatic down hill slide the doctor in Connecticut thought was inevitable anyhow.   (talk about a self-fulfilling prophecy).   The Connecticut medical team was acting as if my Mom only had a couple weeks left  so another brother, my father, and I figured there was nothing to lose and everything to gain by taking her to Florida.  (Our family members who lived in the Northeast full time were very upset with us for taking our Mom away from them.  It was not easy to get her out of this downward slide of a situation).

Soon after we got to Florida, I found a Whole Foods store twenty miles from their Florida home.   I found the curcumin root there and started her on the tea again.   When we got to Florida, my mom wasn’t talking much and her voice was very weak.   She has ended up in a wheel chair from a seizure and a fall she had in Connecticut in September.   Two weeks now after drinking the curcumin root tea twice a day,  her voice is strong and she can engage in conversation, even has become quite the comedian.   She can once again feed herself and is now working on getting her capabilities back to get out of the wheel chair – does an hour of physical therapy every day, goes to Feldenkrais twice a week to regenerate the lost neural networks that caused her left side paralysis and rallies the whole family before dinner every day to take her swimming.

And we were able to get her an appointment at the Burzynski Clinic to evaluate if that therapy could help her more.   We are also even entertaining the idea with her of entering into an independence immersion program in San Francisco to help people with brain injuries learn how to live independently again.

It all started with this little root.   What I learned by studying this root over the past several weeks, was that what I had been doing – slicing up a root, and boiling it in water and using it to make a tea was actually releasing the very substances that were able to cross the blood brain barrier to kill her brain cancer cells.   My Mom likes black tea so we just steep a decaffeinated black tea bag in the curcumin water and mix in a little stevia.   Soluble curcumin crosses the blood brain barrier to kill the type of cancer cells my mom has – http://www.sciencedirect.com/science/article/pii/S0006899309002182.   The water soluble form though is very unstable so we use the water right away.   Another report I read said that steeping this root in oil releases the same compound that crosses the blood brain barrier and the compounds stay stable a lot longer in a lipid solution.   But since we don’t normally cook with this spice – I don’t have the recipes yet to use this oil that my mom would enjoy.   It is mentioned in many of the articles I’ve read on curcumin on why people in cultures that use turmeric have a much lower incidence of cancer.

I would normally say check this out with your doctor if you have concerns.  But what I’ve learned about the medical profession is if you want to stay alive, stay away from your doctor and do your own research. Remember this is the same group of professionals that took a hundred years to start hand washing as a practice to protect their patients (still typically 15% of doctors fail at this very simple practice).   Many doctors are very averse to changing their practices no matter what evidence there is to the contrary.   If you don’t like what your doctor is telling you – go find a new one.   We may have finally found medical professionals focused on doing what is right to help my Mom recover from her brain cancer.   We think they are at the Burzynski Clinic – I will report back when we get there.

Pistou Soup – this is for you Jean

Sunday, January 30th, 2011

Initiation – Jean, my lovely sous chef for making this soup wanted the recipe. Okay, I need to confess, being the sous chef requires you do pretty much ALL the work for this soup. Jean – find yourself a sous chef and this soup becomes VERY easy to make.

Planning – as stated above, the first requirement for making this soup is having someone capable of using a sharp knife without injuring themselves to help you. You (or they) will be cutting a LOT of vegetables into small bits. You will also need a large stock pot.

Ingredients

1/4 cup good olive oil
3 large Leeks
10 cloves garlic
1/2 cup fresh oregano
1/2 cup fresh basil
1 large acorn squash
10 large roma or heirloom tomatoes
2 cups softened red beans (you can use canned but drain them well)
2 cups softened large white beans (canelli beans, lima beans or some other white beans – not Fava though as some folks have a unknown severe allergy to fava beans).
1 – 2 cups left over pasta cut into small bits (I use the pasta I make for this)

Execution

Wash and slice the leeks.
Place them into the stock pot on very low heat with the olive oil. You are going to “sweat” the vegetables BEFORE you add the water. This releases much more flavor into the final soup. Keep the temperature low – you are not browning anything in this recipe.
While they are sweating, peel and thinly slice the garlic. Add to the leeks to sweat the garlic as well.
Finely chop the basil and oregano. Add this to the sweating vegetables.
Peel the acorn squash. Remove the seeds and put aside (you can roast these later to munch on).
Dice the acorn squash into 1 inch squares. Add to the sweating vegetables. Cook for about 20 minutes BEFORE adding the tomatoes.
Cut the tomatoes into the same small squares – skin, seeds and all. Add to the sweating vegetables. sweat for another 15 minutes.
Add the softened beans. sweat for another 15 minutes.
Put 4 – 8 cups water (depending on the volume and thickness of the soup you want to make).
Heat slowly. Then add the left over pasta.
Salt and pepper to taste.
When serving, sprinkle with fresh herbs and squeeze a bit of fresh lemon juice

Monitor and Control

Keep the temperature low
This recipe is a take your time type of thing. It is good if you are multi-tasking with this making other things – like making bread, posting other recipes in your blog, etc.
Make sure anyone you have helping you knows to keep the temperature low on the stove – especially when you add the tomatoes. If the temp gets too high, the tomatoes lose their shape and the soup looks like it has tomato puree in it instead of just little bits of tomatoes.
Also, make sure the acorn squash is mostly cooked (slightly firm and not mushy) before you put in the tomatoes.

Closeout

This is a great soup to put in little containers and freeze. I use glass bowls with good lids and move it right to the microwave for a nice lunch.

Square Foot Garden Project In Connecticut

Tuesday, May 11th, 2010

Michelle LaBrosse, PMP

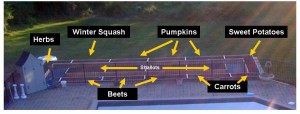
Square Foot Garden May 10, 2010

Square Foot Garden May 10, 2010

Project Initiation

This project fulfilled several requirements (i.e. it is what is known as a “robust” solution). The first requirement was to create a beautiful vegetable garden that would increase the property value. The second requirement was to increase the occupants’ capability of being self-sustaining. The third requirement was to shore up the hill to stop the effects of gravity on the pool and the other landscaping up the hill.

Project Planning & Execution

Site Selection – This project required that we build a retaining wall FIRST and then build the square foot garden beds on the top of the newly flattened surface. We choose the site right off the pool to take advantage of the existing fencing AND to help stop the gradual slippage of the pool and the surrounding decking down the hill. This site also is in full sun the entire day.

Site Prep – My cousin – Bill LaBrosse and his friend (Tom Butcher) (both masons) built the retaining wall. I know why these guys stay so thin – that is a lot of manual labor building the wall and back filling it by hand with the six ton of gravel. They spent three weeks living at the house for four days at a time working on this project 15 hours a day.

Building the Beds – This took two truck loads of material – peat moss, manure and vermiculite. We are putting in several thousand worms to have direct in dirt composting and to help with soil aeration. The worms as part of their digestion process excrete waste that is high in nitrogen and phosporus. The goal is to do minimal intervention in the soil throughout the years. The raised beds eliminate soil compaction.

Planting Prep – the vegetable selection was based on the availability to harvest, shelf life of the vegetables and resale possibilities. We selected shallots as they have a 120 day growing season, capture a pretty high market value when packaged correctly, and have a shelf life of 8 months. We also planted other root vegetables that have a long shelf life – carrots, beets, sweet potatoes. We planted pumpkins and winter squashes as well that have a long shelf life.

Protection – we selected the fencing to match the pool fencing to ensure the garden maintained the beauty of the property. The height of the retaining wall will keep out the most invasive predators in the area – the deer. We are installing wire mess along the bottom foot of the fence to keep out the rabbits and other small critters.

Project Monitoring and Control

The weather was the biggest detriment to our schedule. The guys were only rained out of working a half day. Luckily the most rain was on the three days of the week they weren’t working. Our first load of manure was real “shit,” excuse the pun. It was loaded with plastic fencing and lots of hay. We used that to patch up places in the lawn. We went to packaged manure because we really do not want weeds in this garden and with the worm plan, we are going to have very good soil for years to come. We figured the expense to get the dirt the right composition from the get go will pay off in increased yields and less maintenance for years to come.

We had a weight problem with the beds (the dirt was separating the wood) so Bill and Tom used an old deck they had just pulled up on another part of the property to make a deck between the beds. They then back filled the rest with larger gravel. It gave the garden a beautifully finished look.

Project Closeout

Will report back on the garden yield at the end of the season. All in all, this project was very satisfying as it is beautiful and will prevent any more settling of the pool decking and the other landscaping.

Knocked it Out of the Park with the Turkey Gravy – No Humble Pie Here.

Friday, November 27th, 2009
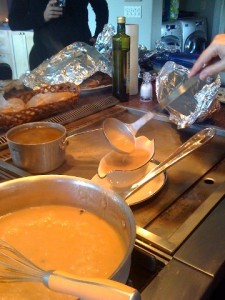
The Magnificent Gravy that Brought it All Together for the Grand Finale

The Magnificent Gravy that Brought it All Together for the Grand Finale

It all started out like your normal thanksgiving by installing a toilet in the master bathroom (see previous posts about hosting thanksgiving in the house currently undergoing a major remodel).   Having taken possession of my Turduckin created and shipped by my favorite specialty foods grocer Bob Kane in Simsbury, CT on Wednesday, game was on for the Thanksgiving gravy.   A turduckn is a chicken stuffed in a duck stuffed in a turkey – between each layer, Bob packs a surprise of cornbread, cranberry stuffing.  For an easier and tastier gravy, I used an oven roasting bag coated with a mix of a half cup of fresh milled hardy white wheat berries, a half tsp of finally diced fresh rosemary and a half tsp of fresh ground pepper.   I placed the turduckin in the bag,  dotted it with 1/4 cup of diced salted butter, sealed up the bag and cooked it in a 325 oven until the meat thermometer registered 165 F.     While the turduckin was roasting, I simmered turkey giblets (neck and accessories but not the liver) with all the leaves from one celery stalk, a tbs of whole peppercorns, and 1 tsp of salt in a 2 quart sauce pan.   (I got the turkey giblets from the back up turkey I was cooking in the event I bombed the turduckin as I have in years past – I am a good project manager after all and had a risk management plan – this also served to help with the gravy making).

When the Turduckin reached the magic number of 165 F internally (which was an hour after the turkey was done),  I let it sit for about fifteen minutes, then had the toilet installer, Kent,  help by lifting up the turduckin bag and all.   I cut a hole in the bottom of the bag and drained the liquid out of the bag into my simmering turkey giblet stock.   (Special note – Kent washed up after he installed the toilet).

Now came the real love.   I made a rue of the fresh milled hard white wheat berry flour and 1/4 cup of butter (I did not whip the butter from cream milked from my own cow – I had a lot on my plate being thanksgiving and all).  I gradually added in liquid from the pan dripping giblet stock mixture – one half cup at a time – whisking it into a smooth gravy.   I have no idea how long it took to make the gravy – all the guests were on the third bottle of wine and no one seemed to notice.

The grand finale of the dinner culminated two weeks of frantic remodeling work – everything went off exquisitely.   Family friend Elizabeth made the journey over the mountains from the bay area to make her legendery corn bread stuffing.    My daughter flew in from college to strut her stuff with mashed potatoes, whipping them into velvety submission.   Other great friends ditched their traditions to come share in the maiden meal in the part of my house that was finally done – the kitchen.

We wrapped up the food fest with my well rehearsed pumpkin pie.   Since we had sampled one of them the night before, I was out purchasing more pumpkin pie fixens to create two more early Thanksgiving day.   It was a bit tough locating more sugar pumpkins at that late an hour, so I substituted some bizarre orange squash – no one noticed.

While everything was fantastic – I am awarding the gravy first place.   Since I was the only judge,  and didn’t solicit others votes, you’ll have to take my word for it.

Will work for beef……

Thursday, November 19th, 2009
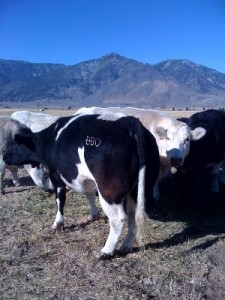
Rump Roast on the Hoof.  Actually This is One of the Mama's.  Notice her BBO brand - Belgian Blue Organicis (NOT BBQ)

Rump Roast on the Hoof.

We have finally found a way to use up 3000 pounds of beef – trade it for labor on finishing up a house project in Nevada.    Just how did I end up with 3000 pounds of beef?   Combine one inexperienced cow handler with an over zealous, non USDA butcher and you end up with 4 or 5 cattle turned into prime beef faster than you can say – medium rare.   Yes this is the danger of running a business in a boss free zone – when you have people who genuinely need a boss, but don’t have one.     We loaded up the local food bank with more beef than they can go through.   But we still have a VERY LARGE freezer full of beef.   The unique solution has appeared – thanks to Craig’s List.   We saw a tile worker advertising that he would work for trade.   He only wanted to trade “durable” goods, but we have found plenty of other trades people quite happy to work for beef.    Everyone wins in this situation – well maybe not everyone if you consider the cow.

Picture to the left are our Mama’s on their new ranch near Minden, NV.  Those are the Sierra Nevada mountains in the background.  Lake Tahoe is just on the other side as is Heavenly ski resort.   You can see these beautiful animals right on route 395 heading into Carson City, NV.   Yes, I watched a lot of Ponderosa as a kid – it looked like a very fun place to live.   We also now have chickens and are looking at getting a couple of weaner pigs.   Some people approach mid-life by getting fast cars and motorcycles, seeing as I did that a while ago, I thought I’d go green acres.

We found this fantastic ranch that had been severely neglected – purchased by an investor hoping to convert it into building lots.   The area is very big on land preservation and is fairly over built as it is.   So, we lucked out and got an 88 acre new home for the herd for a very good price.   We have some work to do on the fields, and we’re learning a lot.   We have discovered that we can grow our own wheat on the land (see blog post several down on my wheat milling experiments).

Prep for the “BIG” Day & Easy Pumpkin Pie Recipe

Saturday, November 14th, 2009

While I was making my third batch of homemade pasta, I was thinking that while I was getting better at the pasta skills, my skills to put on a Thanksgiving bash might be a bit rusty and this year might be even harder than most.    Every project starts with “boundary conditions.”  Those are the pre-requisites you need to even start the project.   This year, we are going to attempt to do thanksgiving dinner in a house that isn’t completed – where the new kitchen is done,  cabinets in, and all the appliances are working.   But it has never been used.   The reason, the small little house that I call home, is too little for the 12 people who are coming to dinner AND we like having this tight of a deadline to push us closer to finishing up the house.

For most people, Project Turkey, starts with a well seasoned kitchen.   For my “Project Turkey” this year it starts with having to move into the kitchen and get part of the house ready for a party.   This means finishing the entry way tile, putting the bathroom fixtures in on the hallway powder room (right now the only functioning bathroom is in the daylight basement and the stairs are not in the house yet so the only way to get to the bathroom is to go outside and around the house to the ground floor entrance),  installing a door to the powder room, AND getting the kitchen set up (with dishes, utensils, cooking tools, verifying all the appliances do in fact work).   The pilgrims put on their first feast with far fewer amenities than I have to work with – I am not expecting anything to arise that we can’t efficiently handle.  Yes I have a high risk tolerance for this project.

Since I love complexity and challenges, have been doing Thanksgiving dinner now for almost 25 years,  this has added a lot more excitement to this holiday for me.   I am practicing on the food elements as well – made a pumpkin pie the other day just to flex my Thanksgiving cooking muscles.    It was very easy:

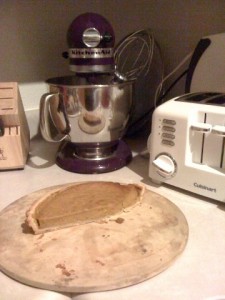
The Practice Pie - Came out GREAT

The Practice Pie - Came out GREAT

Ingredients:

  • 1 small sugar pumpkin (2 – 3 pounds)
  • 1 1/2 cups whipping cream
  • 1/2 cup sugar
  • 2 eggs
  • 2 tsp pumpkin pie spice
  • Pie crust (I cheat and get mine at Trader Joe’s).

Directions

Cut the top off the pumpkin, and remove all the seeds.  (you can cook these as well for a nice snack).   Put the pumpkin in an oven proof dish you can cover.  Put in a 350 degree oven and cook for 1 – 2 hours until it gets soft.  Let the pumpkin cool.  Scoop out the insides and cream with sugar, eggs, cream, and pumpkin pie spice.  Pour into dough lined pie pan.  Cook in the 350 degree oven for an hour or until a butter knife comes out clean.  Let cool for several hours or overnight.

The Cheetah Mobile and Tortelli de Zucca

Thursday, November 12th, 2009
The Cheetah Mobile Hits the Roads in New England

The Cheetah Mobile Hits the Roads in New England

Project Initiation

Jean Steinmetz, PMP – my right hand, left hand, colleague extraordinaire who has been working with me since 1997, took the initiative to create a Cheetah Mobile out of the company mini-van.  Now this is the main vehicle I drive when I find myself on the east coast, but when I’m gone, Jean gets to drive this moving billboard.  Since I had a flight out in the early AM, Jean and her daughter (who was born the same year I started Cheetah Learning), came over for a sleep over to get the mini-van,  bring me to the airport in the early am, and to make Tortelli de Zucca.  I was able to use  my new found pasta making skills from Italy and my fresh milled flour.

Project Plan

I had to pick up the pasta maker and the farm fresh eggs (a VERY IMPORTANT PART OF FRESH PASTA).

I had the fresh milled flour, the Parmagiano Reggiano cheese and the pastry bag.

Jean and her daughter brought the canned pumpkin (okay so we cheated on this).

We had to run out and get the Ricotta cheese and the almond biscotti cookies.

With all the ingredients- this is what we did to make 40 Tortelli de Zucca (ravioli with pumpkin filling).

Project Execution

Pasta – 2 cups of flour (fine grind), 3 to 4 eggs.

Put the flour in a pile on a clean counter.   Make a well in the middle of the pile of pasta and put in 3 eggs.  Combine with your hands.  If the dough needs more moisture, add in a fourth egg yoke.   Wrap the dough in saran wrap and let rest for 30 minutes.

Filling – Mix 8 oz of pumpkin with 8 oz of ricotta, 3 tbs freshly grated parmagianno reggiano cheese, a tsp pumpkin pie spice, and three crushed almond biscotti cookies.   Let sit for 30 minutes.

Making the Tortelli’s

Divide the dough into thirds.   With the first third, put it through the pasta maker, starting at the first setting and going to the thinnest setting (it will get very long).

Make the Tortelli’s – Using the Pastry bag, put a 1 – 2 tsp dollop of pumpkin filling on half of the dough – about 1 to 2 inches apart.   Use the other half of the dough to cover the section of the dough with filling.   Press the top dough into the bottom dough.   Use a small wheeled cutter to break the tortelli’s into 2 – 3 inch squares.

Cooking the Tortelli’s – you want to boil the tortelli’s that you wish to eat.  Freeze the rest.   Drop the fresh tortelli’s into boiling water.   Boil three to five minutes.   Take out with a slotted spoon and drain.

Serving the Toretelli de Zucca – melt some butter in a fry pan.  Place one layer of toretelli’s in the pan, coat with the butter, letting the outside get just a little bit crisp if desired.   Put on plate, and sprinkle with freshly grated parmagiano reggiano chees.

Project Control

They came out GREAT – this is why I’m sharing the recipe with you.

Project Close Out

What a mess – thank god I have a cleaning lady and that we wore aprons.

Grinding My Own Flour Experiment

Tuesday, November 10th, 2009
The first part of the flour experiment - make my own bread.

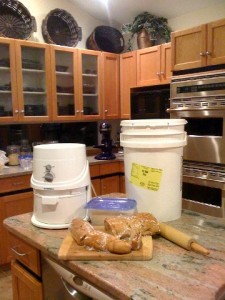
The first part of the flour experiment - make my own bread.

Here is the story of how I got into milling my own flour from wheat.

Project Initiation

I was watching the Green Channel on the reality show where the families are living on food they can get within 100 miles of their homes.   The biggest challenge they were facing was how to make their own bread as the wheat was hard to come by.   A natural foods grocery store was able to get them the whole wheat berries, but they had to grind the wheat themselves.    The bread they made was dense and coarse.    I thought back to this book I had recently read called the “Blue Zones”  – its about areas of the world where people live the longest.  I remembered the mountain people of Sardinia.  The men lived the longest – they primarily ate the local cheese and locally made bread that was made with locally grown wheat.   Then I recalled all the research I have done on how food impacts learning – we have our students eat a diet of complex carbohydrates and protein to improve their ability to retain a lot of information in a short period of time.    As simple carbohydrates found in highly processed foods spike blood sugar which increases the brains beta state and makes it harder to stay calm, relaxed and focused in tense situations.    I was thinking, maybe, just maybe the reason why people are getting fat in the very developed parts of the world is that they are eating too much of the simple carbohydrates – and NOT because they have a self-discipline deficiency.  But because it takes much more of that type of food to get the proper nutrition that the body needs.   I recalled reading something that people rarely overeat meats, cheese, fruits, and vegetables – they get satiated on reasonable portion sizes of those foods.  HOWEVER, people routinely overeat commercially processed breads, cakes, cookies, candies, pastas, white rice.    COULD WE BE EATING TOO MUCH OF THIS STUFF BECAUSE OR BODIES ARE TRYING TO GET THE PROPER NUTRITION?

So I thought, let me experiment on myself.  I have tried diets such as the Atkins diet, the south beach diet – these severely restrict your carbohydrate intake.   Over time I just felt like I was missing out on too much of life to stay on them.    When I took a four month sabbatical last year, I lost 30 pounds just by eating more of the food I made myself and relaxing.    Since I neither want to take off four months again, OR severely restrict my consumption of the staff of life – bread – I figured, let me see what happens to my food craving patterns if I make my own flour from wheat like the folks did on the 100 mile experiment.    I’m pretty healthy to start with – so I’m doing something right already – but I don’t eat that much bread and after reading the Anti-Cancer book last year, I do my best to stay away from refined sugar.

Project Plan

To start with – I needed to get a machine to grind the wheat berries into flour.   I talked with a friend of mine who’s mom has been grinding her own wheat for years.  His biggest complaint was the bread was too dense and coarse.   So I was committed to making bread that was lighter.   Dense and coarse bread is nice as a novelty and to use for making toast  – but I prefer lighter breads for sandwiches.   I found the Pleasant Hill Grain company via google, and ordered the the Nutrimill Grain Mill that could do fine or coarse grinding on the wheat.

On the Pleasant Hill Company site they also have a variety of types of wheat for sale (they are located in Nebraska – but I am not doing the 100 mile challenge).   On the grains section of their site they give a whole explanation of milling your flour right before you use it as that preserves the most nutritional value of the wheat.    Per their recommendation,  I ordered the hard white and the hard red wheat berries.

I ordered this all a week before I went to Italy.   It didn’t make it to my house before I left.   Which I guess now is a good thing – there is no way I would’ve had time to eat the bread before I left AND you’re only supposed to mill the flour that you need – right before you need it.

Project Execution

When I got back from Italy – my mill and wheat were waiting for me at my house.   The wheat shows up in these five gallon buckets that protect it from bugs and rodents.  They also protect it from YOU.   It took me about an hour to get the wheat container opened.   I definitely burned a lot of calories trying to get the lid off the wheat.

I had also learned in Italy – that when eating very simple foods that were made fresh, I did actually lose weight while spending a lot more time eating.  So the experiment was well underway, accidentally.

I went to work milling my first round of flour.   I had managed to open the hard white wheat berries so that was what I was going to use.   I made my standard bread recipe:

1 Package yeast

1 cup warm water

1 TBS honey

Proof the yeast – this means you mix the yeast, water, and honey and wait to see if the mixture starts to bubble – when it does, the yeast is viable and ready to use.

Add

1 tbs good cooking oil

1 egg

1/2 cup of walnuts (I like nuts in my bread)

enough flour to make an elastic dough (the amount is really dependent on the flour).

I use a kitchen aid mixer with a dough hook.   When the mixer engine starts to smoke, I take the dough out of the bowl and knead it by hand for another 5 – 10 minutes.   Kneading the dough is very important as it gets the wheat to release gluten that feeds the yeast and makes the dough rise.

Next, I lightly oil the bowl, put the dough back in the bowl, cover it with a clean kitchen towel, and put it in an unheated oven with a pan of water that has been boiled on the stove.  This creates a nice warm moist environment for the yeast to work it’s magic on the dough.

I let it rise until the dough is double in volume.  Since this was an experiment, I had no idea how long that would be.  It took about three hours.

Punch down the dough, roll it out and make it into whatever type of loaf you would like.   I divided the dough into two sections and made a baguette and a typical loaf of bread.  For the typical loaf of bread, I rolled it out with a rolling pin, put cranberry sauce on it and rolled it back up.

Boil the pan of water again, and put the loaves back in the oven to rise.

I had to go to several meetings so they were left to do their thing on their own for six hours.  When I got home, they had again doubled in size and were ready to cook.

I cook bread in an oven about 350 – 375 degrees for about 30 – 45 minutes.   To test for doneness – you tap on the top of the bread – if it sounds hollow, it is done.   The baguette was done in 30 minutes, the regular loaf, 45 minutes.

Project Control

Well here was the moment of truth on this experiment.   The baguette was great – I had one slice and was stuffed.   Too full to eat a piece of the cranberry swirl loaf.   So I waited until the morning and had a piece of the cranberry swirl loaf for breakfast.  The bread has somewhat of a “nutty” taste – duh – I had put in walnuts.  The texture is denser than store bought bread, but still light.   And since I did the fine grind, the bread is not coarse – it’s more like the texture of a sponge cake.   There is no sandy gritty feel to this bread.

Lets see how long it takes me to get hungry after I had that piece of bread.   Typically after a bowl of cereal, I’m hungry about 2 to 3 hours later.   I did only eat one slice of the bread.  Usually when I have toast, I have two slices of bread.    Right now, I am too full for another piece of that bread, or anything else for that matter.

Project Closeout

This flour is very slippery when it gets on the floor.   I’ve cleaned up the kitchen – it was getting kind of dangerous with that fine powder on the floor.   Next I might try to use the flour to make my own pasta.   I have to remember that you need to mill the flour right before you are going to use it to have the most nutritional value.   I’ll be giving the flour I’ve already milled to friends and family as I did go a little overboard with the milling machine – I wanted to see what type of loading the machine could take (better to find out before the warranty ran out).   It worked just fine through several hours of use.